Using the Entity Model in a Console Application
We will now use the model we created above, in a Console Application.
Step 1: Open Visual Studio 2010 > File > New Project > In the templates, select Windows > Console Application. Make sure the target framework is ‘.NET Framework 4.0’. I have called the application ‘ConsoleAppUsingMyModel’. Click Ok.
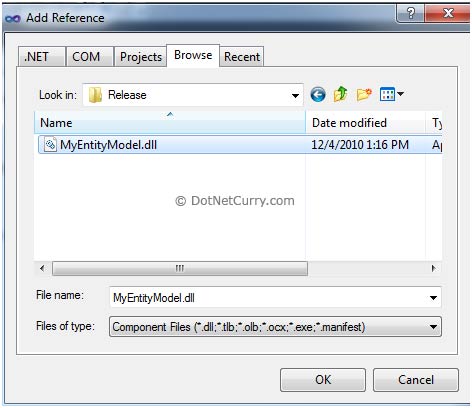
Step 2: Let us now add a reference to the model we created earlier, in this console application. Right click the project > Add Reference > Browse Projects Tab and browse to the MyEntityModel project. Go to the 'bin' folder > Release and select the MyEntityModel.dll as shown below. Click OK.
Also make sure you add a reference to the System.Data.Entity, this time using the .NET tab

Step 3: In this final step, our console application needs to have the information about the connection string which contains the metadata and details of the database connection.
Note: If you skip this step and directly query the model, you will get an error The specified named connection is either not found in the configuration, not intended to be used with the EntityClient provider, or not valid.
Now you can either create your own .config file in this project and add the connectionstring entry of your model or simply copy the App.config file that you created in the MyEntityModel project, in your Console App project. We will adopt the simpler way. Right click the project > Add Existing Item > Go to the MyEntityModel project and add the App.config file.
Step 4: Once the steps shown above are completed, you now need to query against the model
No comments:
Post a Comment